Making a crust can be one of the more frustrating parts of baking. Especially when you're experimenting with different fillings or are pressed for time, it's often just less time-consuming to use a store-bought crust. But when you want a good homemade crust, any of these recipes would fit the bill.
Cheesy Quiche Crust
This is a yummy, simple crust for quiche. If the crust still doesn't seem fully baked at the end of the quiche baking time, turn up the oven to 425°F for about 10 minutes. Quiche freezes well, so you can always pop slices back in the oven at 425°F and the crust will continue to get crispier and flakier.
Perfect Pie Crust
This was the crust recipe I linked to for the pumpkin pie (well, butternut squash pie) in the last post. I thought it deserved another link here.
Shortbread Crust
This is included in a lemon tart recipe--it is a very good recipe too!--but it could work with any tart filling, or possibly even with just fruit and whipped cream if baked on its own.
Apple Pie Crust
Although I loved the Perfect Pie Crust above for pumpkin pie, this one from The Unofficial Harry Potter Cookbook is my go-to for apple pie. The filling recipe is excellent as well; I usually add a little brown sugar to it when simmering.
Showing posts with label Recipes. Show all posts
Showing posts with label Recipes. Show all posts
Thursday, October 30, 2014

Wednesday, July 2, 2014
Midweek Recipe Roundup.
This weekend there will be chocolate bacon cupcakes. In the meantime, enjoy some more recipes!

This recipe isn't very difficult, but it does take some time to prepare. I use ricotta cheese instead of cottage cheese and double the cheese mixture. I can never estimate the amount of sauce and cheese needed to make the lasagna come out with the same layers every time. Don't worry about it if you can't divide the sauce into fourths, etc.; just layer them how you like! I will say it usually bakes the best for me when I end with sauce and put mozzarella on top.
This is a simple no-yeast bread that doesn't require a rise or much kneading. If you can't find currants--they're a seasonal item at some stores--raisins work as well. The dough really will be sticky and look a bit flat on the pan before baking, but it comes out in a very nice round loaf.
Boiled white icing, or "7 minute icing" is great on less-dense cakes like coconut cake. It's very popular for cupcakes or "occasion" cakes. If you like being more precise than "until mixture is bubbly," cook the sugar, water, and cream of tartar to reach 240 degrees Fahrenheit, or thread stage. Try not to stir, because this can cause the sugar to crystallize. Add it slowly to the egg whites while whipping.
DEEMS THESE RECIPES:
All easier than pie.
Monday, June 23, 2014
I'll Have Chicken. Baked, Not Fried.
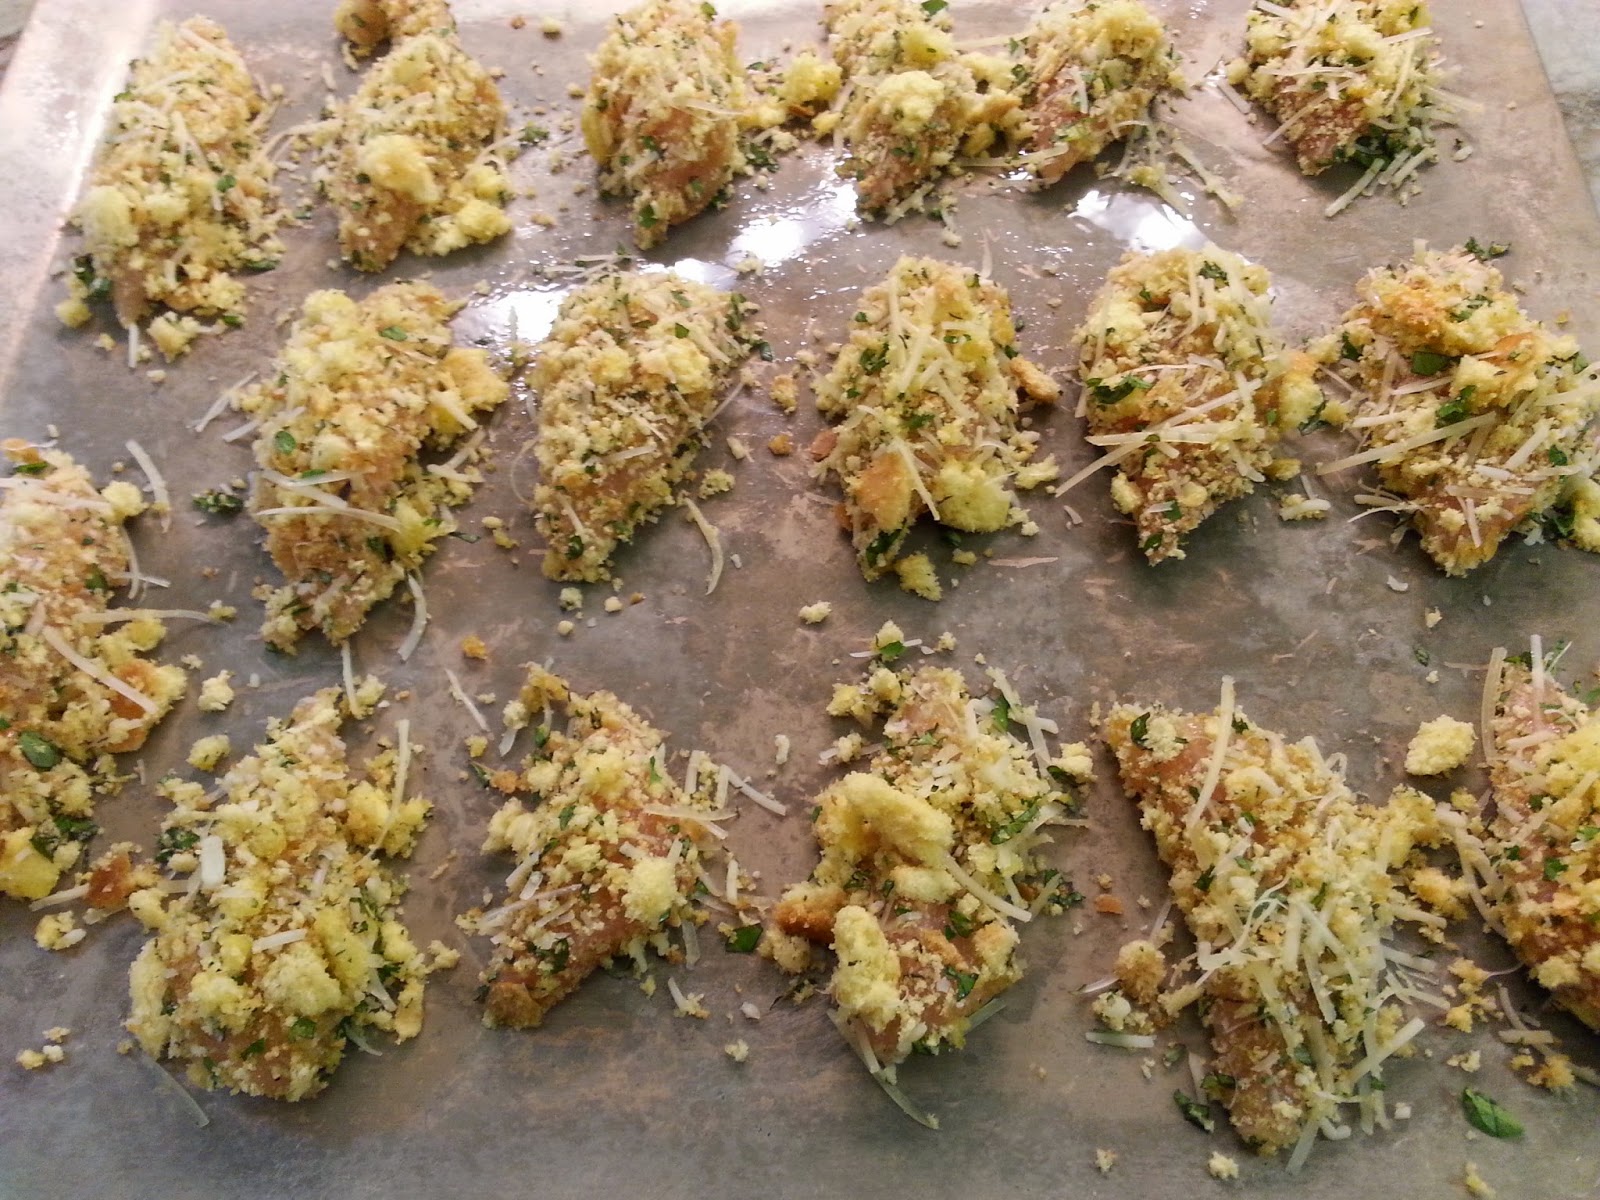
While I have yet to master fried chicken, I quickly got down this oven-baked chicken strips recipe. It's easy, quick, and tasty. The only mistake I made when making these for the first time was putting the strips on a regular baking sheet and leaving them alone until taking them out of the oven. So most of the coating stuck to the pan, and what we were left with was just... plain chicken. Most of the evening was spent scraping up and eating the "yummy crunchy bits" from the pan. The next time, I used a nonstick spray and made a couple other changes, and since then, I've used the recipe regularly.
What I did wrong/changed:
1) Used a regular baking sheet without either a) flipping the chicken midway through baking, or b) using a nonstick spray or sheet.
2) Used butter. Admittedly, it does taste good, but ever since I've used about 1/2 c. olive oil because I think it doesn't overwhelm the taste of the spices as much.
3) Used finely grated Parmesan cheese. Again, it wasn't like this tasted bad. However, I think shredded cheese is better in this recipe. The cheese, along with the bread crumbs, adds some crunch.
Because I use this recipe as a quick dinner, I usually use packaged Parmesan and buy chicken breast strips. Because I recently started an herb garden, I did use fresh basil, thyme, and oregano here, but in this particular recipe, the taste isn't much different with dried.



DEEMS THIS RECIPE:
What I did wrong/changed:
1) Used a regular baking sheet without either a) flipping the chicken midway through baking, or b) using a nonstick spray or sheet.
2) Used butter. Admittedly, it does taste good, but ever since I've used about 1/2 c. olive oil because I think it doesn't overwhelm the taste of the spices as much.
3) Used finely grated Parmesan cheese. Again, it wasn't like this tasted bad. However, I think shredded cheese is better in this recipe. The cheese, along with the bread crumbs, adds some crunch.
Because I use this recipe as a quick dinner, I usually use packaged Parmesan and buy chicken breast strips. Because I recently started an herb garden, I did use fresh basil, thyme, and oregano here, but in this particular recipe, the taste isn't much different with dried.
1 cup of breadcrumbs is usually 2-3 slices. I do cut the chicken strips in half just so that there will be more breadcrumb mixture on each bit.
After preheating the oven to 400°F, I crumble the bread with my hands--make sure you have clean hands if you do this!--but if you want more evenly sized crumbs, you can use a food processor. Then I mix together the bread crumbs, Parmesan, thyme, basil, oregano, salt, garlic powder and red pepper* in a medium-size bowl, and put the olive oil in another, smaller bowl.
After dipping both sides of each strip lightly in the olive oil, I roll them in the bread crumb mixture and place them on a baking sheet (either nonstick, misted with nonstick cooking spray, or if neither, I flip them 10 minutes into baking).
Usually if there is more breadcrumb mixture left,
I sprinkle a bit extra on top.
After much experimenting, I've found that in our oven, baking consistently takes 16-17 minutes. If a meat thermometer reads about 155°F, take the chicken out and let it sit for a few more minutes until eating. It should reach the required "doneness" (165°F) during that time. Taking chicken out of the oven when it has already gotten to that temperature makes chicken tough and dry.
And it's ready to eat. Some of the breading will inevitably stick to the pan no matter what. Just use a spatula to enjoy the yummy crunchy bits :-).
**
Much, much easier than pie.

*Because I have a peculiar affinity for mnemonic devices, I remember the herbs and spices like this:
True Blue Orangutans Smack Gorillas Roundly***, with the amounts decreasing, respectively, from 1 1/2 tsp, 1 1/2 tsp, 1 tsp, 1/2 tsp, 1/2 tsp, pinch (between 1/16 and 1/8 tsp).
**Aren't these kitchen towels my mother-in-law made adorable?
***Well, I did say "peculiar."
Wednesday, June 18, 2014
No Loafing Around.
Growing up, I wasn't fond of meatloaf. I was puzzled as to why one would form meat into a loaf in the first place, although that alone wouldn't have stopped me from eating it. Perhaps I didn't like it because everywhere I went people put ketchup in it, and even now when I'll eat other tomato-based sauces, I just don't like that taste. So when I started cooking myself and found out that ketchup wasn't a required ingredient, I was eager to experiment. I made meatloaf with barbecue sauce, soy sauce, A-1, regular tomato sauce. ... And I still didn't like it.

Then I found a recipe in Taste of the South magazine that didn't use any sauce at all, other than a little bit of Worcestershire. Well, it did originally call for chipotle chilies in adobe sauce, but because I had chipotle chili powder already, I decided to substitute. The recipe also called for ground sirloin and ground pork. After the first time, I decided that the plain ground pork tasted rather bland, so I substituted Italian sausage. But it was the chili powder substitution that caused a problem.
I couldn't remember the spiciness level of chipotle chili powder and only remembered that the last time I'd used it in a recipe I used 1/2 tsp, and it hadn't been very spicy at all. I had forgotten that what I'd used it in was a dipping mixture for candied bacon, in which the powder was easily dispersed among the other ingredients. So when I extrapolated from that and added "a bit more than last time," in the meatloaf, the finished product was on the fiery end of the spectrum.*

What I did wrong the first time:
1) Added too much chipotle chili powder.
2) Used regular ground pork.
3) Didn't drain the meat before adding the cheese.
So here are the recipe and instructions for the good version...
CHIPOTLE-CARAMELIZED ONION MEATLOAF
2 tsp vegetable or canola oil
1 1/2 tsp salt
1 1/2 c. chopped onion (~1 medium onion)
1 lb ground sirloin
1 lb ground mild Italian sausage
2 slices white (or other soft) bread
1/4 c. milk
1 lg. egg
1 tbsp Worcestershire
1 tbsp fresh chopped thyme (or 1-2 tsp dried)
1/8 tsp chipotle chili powder**
Opt. ~1/4 c. BBQ sauce
Shredded cheese for topping
First, tear the bread into pieces and place them in a bowl with the 1/4 c. milk. This will soften the bread and make it easier to mix everything together.

Then you can move on to caramelizing the onions. Add the oil to a frying pan or sauté pan, and cook the onions over medium-high heat until they become translucent and the edges start to brown, then add 1/2 tsp salt. Reduce the heat to medium-low and continue cooking and stirring until the onions are soft and a deep golden brown, about 20 minutes.
During this process, especially if you're using a pan that isn't non-stick, it sometimes helps to add a tablespoon of water every now and then to keep the onions from drying out and sticking too much. You will still need to scrape brown bits from the bottom, stir, and watch them so they don't burn. Then take them off the heat to cool.


DEEMS THIS RECIPE:
Much easier than pie.
(Just watch the onions.)
*I can eat and enjoy a medium spice level, but I'm no "spicy food lover," and others in my family don't like much spice at all. 1/8 tsp was a good level of spice for everyone. What I'm saying is, use your discretion when adding spice to recipes. If your entire family loves spicy food, you can always use a bit more than 1/8 tsp. Though I'd suggest trying the recipe as is once for reference.
**See (*)
I do not like them, Sam-I-am.
... Um, remind me, why are these eggs green again?
Then I found a recipe in Taste of the South magazine that didn't use any sauce at all, other than a little bit of Worcestershire. Well, it did originally call for chipotle chilies in adobe sauce, but because I had chipotle chili powder already, I decided to substitute. The recipe also called for ground sirloin and ground pork. After the first time, I decided that the plain ground pork tasted rather bland, so I substituted Italian sausage. But it was the chili powder substitution that caused a problem.
I couldn't remember the spiciness level of chipotle chili powder and only remembered that the last time I'd used it in a recipe I used 1/2 tsp, and it hadn't been very spicy at all. I had forgotten that what I'd used it in was a dipping mixture for candied bacon, in which the powder was easily dispersed among the other ingredients. So when I extrapolated from that and added "a bit more than last time," in the meatloaf, the finished product was on the fiery end of the spectrum.*
I suppose when using a scale that goes over 1,000,000
3,000-10,000 SHU isn't a large range...
What I did wrong the first time:
1) Added too much chipotle chili powder.
2) Used regular ground pork.
3) Didn't drain the meat before adding the cheese.
So here are the recipe and instructions for the good version...
CHIPOTLE-CARAMELIZED ONION MEATLOAF
2 tsp vegetable or canola oil
1 1/2 tsp salt
1 1/2 c. chopped onion (~1 medium onion)
1 lb ground sirloin
1 lb ground mild Italian sausage
2 slices white (or other soft) bread
1/4 c. milk
1 lg. egg
1 tbsp Worcestershire
1 tbsp fresh chopped thyme (or 1-2 tsp dried)
1/8 tsp chipotle chili powder**
Opt. ~1/4 c. BBQ sauce
Shredded cheese for topping
First, tear the bread into pieces and place them in a bowl with the 1/4 c. milk. This will soften the bread and make it easier to mix everything together.
Then you can move on to caramelizing the onions. Add the oil to a frying pan or sauté pan, and cook the onions over medium-high heat until they become translucent and the edges start to brown, then add 1/2 tsp salt. Reduce the heat to medium-low and continue cooking and stirring until the onions are soft and a deep golden brown, about 20 minutes.
During this process, especially if you're using a pan that isn't non-stick, it sometimes helps to add a tablespoon of water every now and then to keep the onions from drying out and sticking too much. You will still need to scrape brown bits from the bottom, stir, and watch them so they don't burn. Then take them off the heat to cool.
I found the pictures for the beginning and the half-way point
but lost the end photo. If you Google "caramelized onions,"
you'll find pictures of the deep caramel color at the finish.
Preheat the oven to 350°F. Stir the rest of the salt, pork, sirloin, Worcestershire, pepper, and thyme in with the milk and bread. Beat the egg lightly and add to the mixture. Then stir in the onions.
I've started adding some BBQ sauce to it at the end because I decided the flavor works well with the chipotle powder, but it's an optional step. I eyeball the amount but would guess it's about 1/4 cup.
I know meatloaf isn't the prettiest meal in the world, but it does at least look better once the mixture is pressed into a loaf pan.
Bake for one hour or until a meat thermometer reads 160°F, then take the loaf out of the oven and drain the meat. I forgot this step the first time, and it really does help. It's fairly easy to drain from a corner of the loaf pan once the meat shrinks a bit, though for obvious reasons I couldn't get a picture of this process.
Then top the loaf with shredded cheese and put it back in the oven until the cheese is melted and bubbly. Take the meatloaf out of the oven, and it's ready to serve.
I do know that it all looks much tastier when it's ready to eat (and it does taste good, which is far more important).
DEEMS THIS RECIPE:
Much easier than pie.
(Just watch the onions.)
*I can eat and enjoy a medium spice level, but I'm no "spicy food lover," and others in my family don't like much spice at all. 1/8 tsp was a good level of spice for everyone. What I'm saying is, use your discretion when adding spice to recipes. If your entire family loves spicy food, you can always use a bit more than 1/8 tsp. Though I'd suggest trying the recipe as is once for reference.
**See (*)
Thursday, June 12, 2014
Tea (or Coffee) and Scones.
Yes, I might have the odd kitchen disaster and silly recipe mistake, but the truth is, I can usually get down a recipe on the first try even if I know I can subsequently make it better, because I become obsessive about observing every detail. If I decide to experiment, I do a lot of research. Will this flavor taste OK with that one? Will this substitution affect any of the other ingredients? Will this recipe be a total failure if I don't use Grade AA Extra-Large organic eggs from free-range chickens and instead only have regular Grade AA Large eggs from chickens that don't range freely?

I've only recently gotten to where I feel comfortable trusting my instincts while experimenting.* So these maple butterscotch scones came out well on the first try. I still have a few thoughts that might come in handy if you want to make them:
1) Because baking powder can lose some of its "oomph" if refrigerated**, I think refrigerating the scones overnight is a step you can leave out.
2) It's easiest to remove the scones from the pan after baking if you use a large knife to fully separate them and then let them cool just a bit on the pan. They can be sticky and fall apart otherwise.
3) If desired, you can use 2 1/2 cups of the quick-cooking oats and leave out the walnuts.
The first time I made these, I didn't refrigerate the dough overnight, though I did the second time to see if it made them better. I think I can safely say it's an unnecessary step. And even though the recipe says to serve them warm, they're just as good at room-temp. I made the first batch without walnuts, because my other half says he doesn't like the taste. Upon trying each, I suppose my reaction could have been more sympathetic...

The main thing to remember when toasting the oats and walnuts is that the color of the oats won't change drastically. You'll smell the walnuts before seeing any change in color, which is when they should be taken out of the oven.


.jpg)


DEEMS THIS RECIPE:
I don't have time for this "the chicken or the egg" nonsense.
I think about which egg makes a better cake.
1) Because baking powder can lose some of its "oomph" if refrigerated**, I think refrigerating the scones overnight is a step you can leave out.
2) It's easiest to remove the scones from the pan after baking if you use a large knife to fully separate them and then let them cool just a bit on the pan. They can be sticky and fall apart otherwise.
3) If desired, you can use 2 1/2 cups of the quick-cooking oats and leave out the walnuts.
The first time I made these, I didn't refrigerate the dough overnight, though I did the second time to see if it made them better. I think I can safely say it's an unnecessary step. And even though the recipe says to serve them warm, they're just as good at room-temp. I made the first batch without walnuts, because my other half says he doesn't like the taste. Upon trying each, I suppose my reaction could have been more sympathetic...
Really. The taste is practically identical.
10 points from Ravenclaw.
But that is especially good news if you don't like or are allergic to nuts.
Just as a general rule for pastries: wet ingredients are mixed separately from dry ingredients and then added to the dry ingredients. (And yes, I do sometimes use a potato masher to cut in butter. I find it works pretty well to use the edge of it with a chopping motion like a knife, and it won't scratch up the bowl.)
I had some camera difficulties with my photos from here on out*** but once the wet and dry ingredients are mixed, the texture should resemble oatmeal cookie dough, only a bit stickier.
Once baked, they'll be golden brown and actually feel a lot like cookies, although unlike cookies, they will have risen, not quite doubled in size but definitely a noticeable amount.
I let them cool a little, then put them on a sheet of parchment paper to glaze them.
When they're done, I definitely recommend having one with a cup of coffee (or tea, or milk, or whatever your drink preference). Just to make sure they came out OK.
Easier than pie.
*I have a hunch that anyone who says nonchalantly, "Oh, I just throw things together," is hiding the fact that they had to learn how to "throw things together."
**For scones and heavier batter and dough, if you need to refrigerate/freeze them, baking powder won't lose much potency. It's just not a step you need to do. With lighter batters, like pancake batter, if you're not going to eat them right away, the best idea is to cook/bake and then store.
***Official Dx: Situational Technical Ineptitude. I accidentally changed the focus and lighting and only this afternoon found how to revert to the original settings...
Wednesday, June 11, 2014
A Midweek Recipe Roundup.
I had planned to do a post about scones today but forgot that they need to be refrigerated overnight before baking, so that will have to wait until tomorrow or Friday. In the meantime, I thought I'd share with everyone links to some of my favorite recipes that already have great, detailed instructions and lots of pictures.
Blueberry Muffins
This recipe is quick, easy, and works just as well with 1/3 cup melted butter in place of the vegetable oil, although it is a little easier to spoon into a muffin tin with the vegetable oil. If you have a larger family and/or want them to last longer, definitely double the recipe.

Chocolate Croissants
These are not that easy or quick, but they are so, so good, and they smell wonderful when they're proofing and baking. The link to the dough recipe is in the ingredients at the bottom. Don't try to substitute regular butter for the European-style in this recipe; the higher fat content/less water content makes the croissants buttery and flaky. It doesn't specify salted/unsalted, but I use unsalted Plugra, figuring that most pastry dough calls for unsalted butter, and it turns out well. If the European-style butter is not in the section with the "normal" butter in your grocery store, it's probably with the specialty dairy/cheese near the deli section.
Easy White Bread
If you've never made bread before (or even if you have), this is a great recipe to follow. The only part that is time-consuming is waiting for it to rise, and even that doesn't take as long as some breads. It also works well as a base for olive oil/herb bread; just substitute oil for shortening, add the herbs with the flour, and to let the dough rise, put it into a bowl rubbed with olive oil instead of butter.

Waffles
Like the muffins, this is a fairly simple recipe, and you can use just one bowl. You can add berries or bananas, but make sure they aren't too chunky, because like pouring in too much at once, it can make the batter overflow in the waffle iron (believe me... I know about these things). If you like extra-fluffy waffles, though, try beating the egg whites separately in another small bowl until they're foamy and folding them in just before folding in any fruit.
Best Ever Banana Cake
The name says it all. It's not a difficult recipe but does take some time; if you want banana cake, though, the results are most. definitely. worth. it. The only thing I changed (and it wasn't exactly a change) about this recipe was toasting the walnuts to use as garnish (spread in an even layer on baking sheet and bake at 375 for ~8 minutes or until they brown and give off a fragrant scent, checking often so they don't burn).
... And don't worry; once I find that elusive fried chicken recipe, I'll be sure to share it, too!
DEEMS THESE RECIPES:
Easier than pie, easy as pie, and everything in between. But all very yummy.
Blueberry Muffins
This recipe is quick, easy, and works just as well with 1/3 cup melted butter in place of the vegetable oil, although it is a little easier to spoon into a muffin tin with the vegetable oil. If you have a larger family and/or want them to last longer, definitely double the recipe.
Chocolate Croissants
These are not that easy or quick, but they are so, so good, and they smell wonderful when they're proofing and baking. The link to the dough recipe is in the ingredients at the bottom. Don't try to substitute regular butter for the European-style in this recipe; the higher fat content/less water content makes the croissants buttery and flaky. It doesn't specify salted/unsalted, but I use unsalted Plugra, figuring that most pastry dough calls for unsalted butter, and it turns out well. If the European-style butter is not in the section with the "normal" butter in your grocery store, it's probably with the specialty dairy/cheese near the deli section.
Easy White Bread
If you've never made bread before (or even if you have), this is a great recipe to follow. The only part that is time-consuming is waiting for it to rise, and even that doesn't take as long as some breads. It also works well as a base for olive oil/herb bread; just substitute oil for shortening, add the herbs with the flour, and to let the dough rise, put it into a bowl rubbed with olive oil instead of butter.
Waffles
Like the muffins, this is a fairly simple recipe, and you can use just one bowl. You can add berries or bananas, but make sure they aren't too chunky, because like pouring in too much at once, it can make the batter overflow in the waffle iron (believe me... I know about these things). If you like extra-fluffy waffles, though, try beating the egg whites separately in another small bowl until they're foamy and folding them in just before folding in any fruit.
Best Ever Banana Cake
The name says it all. It's not a difficult recipe but does take some time; if you want banana cake, though, the results are most. definitely. worth. it. The only thing I changed (and it wasn't exactly a change) about this recipe was toasting the walnuts to use as garnish (spread in an even layer on baking sheet and bake at 375 for ~8 minutes or until they brown and give off a fragrant scent, checking often so they don't burn).
... And don't worry; once I find that elusive fried chicken recipe, I'll be sure to share it, too!
DEEMS THESE RECIPES:
Easier than pie, easy as pie, and everything in between. But all very yummy.
Subscribe to:
Posts (Atom)